Introduction
Just bought a GoPro HD Hero camera - love it!
The video above is it's maiden voyage. On this page I want to share my experieces of using the camera and, more importantly, the workflow I used to process the H.264 video.
Mounting the GoPro HD Hero
I mounted the GoPro HD Hero to the front grille of my car using the Display Mount that came in box. I used the display mount because I didn't want to use the sticking tape on my car's paintwork.
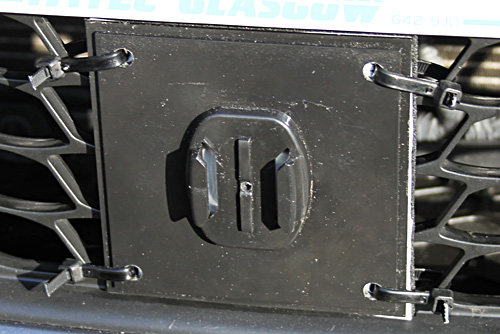
Modifying the Display Mount
I drilled four holes near the corners of the Display Mount using a 6mm diameter drill (1/4 inch). I then stuck a peice of foam (about 8mm thick) onto the back of the Display Mount using some double sided sticky tape. This was done so the mount would 'conform' better to the grille on the car and cause less vibration.
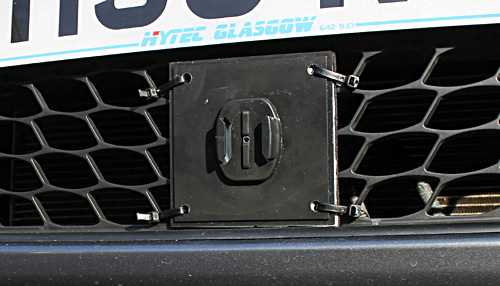
Attaching the Display Mount to the car grille
I then used some long cable ties to attach the Display Mount to the grille of the car below the number plate. I tried to get it as level as possible. I managed to get the cable ties nice and tight so there was no play.
Mounting the GoPro HD Hero Camera
I then mounted the camera onto the Display Mount. I think I used the Side Mount Pivot arm and a Quick Release buckle to get the camera to face to the front.
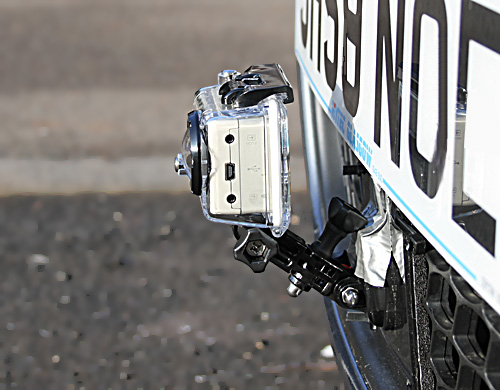
Even using the orange anti-rattle gizmo the camera still moved more than I'd have liked. To solve this I stuck a small strip of silver coloured tape over the Quick Release Buckle pulling it tighter to the mount.
Camera Settings
I wanted to get the highest quality video possible so I used r5, Full HD 1080p (1920x1080). Set it recording then went for a drive.
Route taken in Glasgow, Scotland.
Pollokshields (link to start on Google Maps), Shields Road, Scotland Street, West Street, Kingston Bridge (M8), Clydeside Expressway, Clyde Tunnel (A739), M8, Shields Road, Pollokshields.
Video Workflow
I used Adobe Premiere CS3 to edit and time remap the video. It doen't support editing of H.264 video so I had to convert the H.264 video to a different format.
I used MPEG Streamclip 1.2 from Squared 5 to convert the H.264 video to AVI format and resize it to 720p (1280x720). I used the following settings.
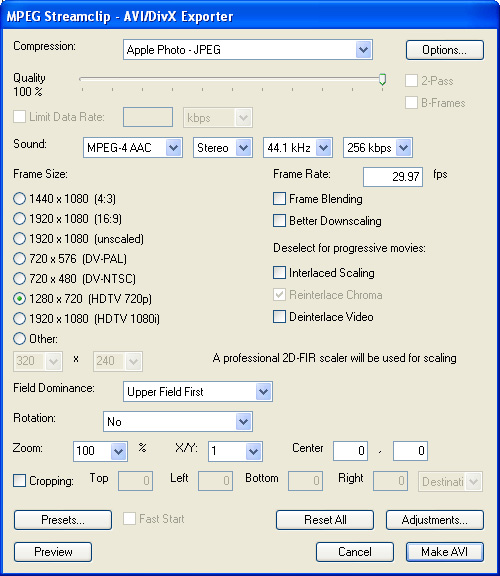
I then created an Adobe Premiere CS3 project - HDV 720p 29.97fps. Imported the AVI video and placed it on the timeline and did some minor edits.
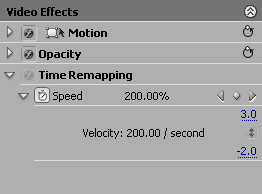
The original video was ~16mins which is too long for YouTube so I decided to time ramap it by 200%. Essentially the video would play at double speed so only last ~8mins.
To do this in Adobe Premiere CS3 select the video track on the timeline and then in the Video Effects panel expand the Time Remapping section and select a percentage.
This will change the duration of the video but it doesn't alter the duration of the audio track. To change this I right-clicked on the audio track and selected Speed/Duration... Then set the speed to 200%. This resynced the audio to the video.
Exporting and Uploading
When I was happy with the video and audio. (and had added some credits) I selected File > Export > Adobe Media Encoder...
I chose the H.264 format. Video set to 1280 x 720. 29.97fps, square pixels. Bitrate settings, VBR, 2 Pass, Target Bitrate - 6, Max Bitrate - 10 (I didn't change the bitrate settings from the defaults so do don't know If I could get better rates and still have a video suitable for upload to YouTube.)
Audio I set to ACC format, Stereo, 44.1kHz and a bitrate of 192.
Then sat back (for a couple of hours!) and waited for it to export.
Then simply uploaded it to YouTube, Vimeo and Facebook. You can see the results at the top of this page. Or by clicking here.
| Top |
